
Last updated: August 12, 2026
This recipe and the nutrition information below are checked against USDA food data and standard baking guidance before publishing.
There is something satisfying about the smell of oats and honey toasting in the oven. A good homemade granola recipe gives you full control over sweetness, crunch, and ingredients while costing far less than most bagged brands at the store. Once you learn the basic method, you can change it up endlessly depending on what you have in your pantry.
This guide walks through the process from start to finish. You will find exact measurements, a clear step by step method, common mistakes to avoid, and plenty of ideas for making it your own.
Table of Contents
Key Takeaways
- A basic batch needs only oats, oil, sweetener, and a pinch of salt to work.
- Baking at a low temperature and stirring often is the secret to even, golden clusters.
- Homemade granola usually has less added sugar than most store bought versions.
- Dried fruit should go in after baking so it stays soft and chewy instead of burning; nuts and seeds bake in with the oats from the start so they toast properly.
- Stored properly, homemade granola stays fresh and crunchy for about two weeks at room temperature.
What Is Granola
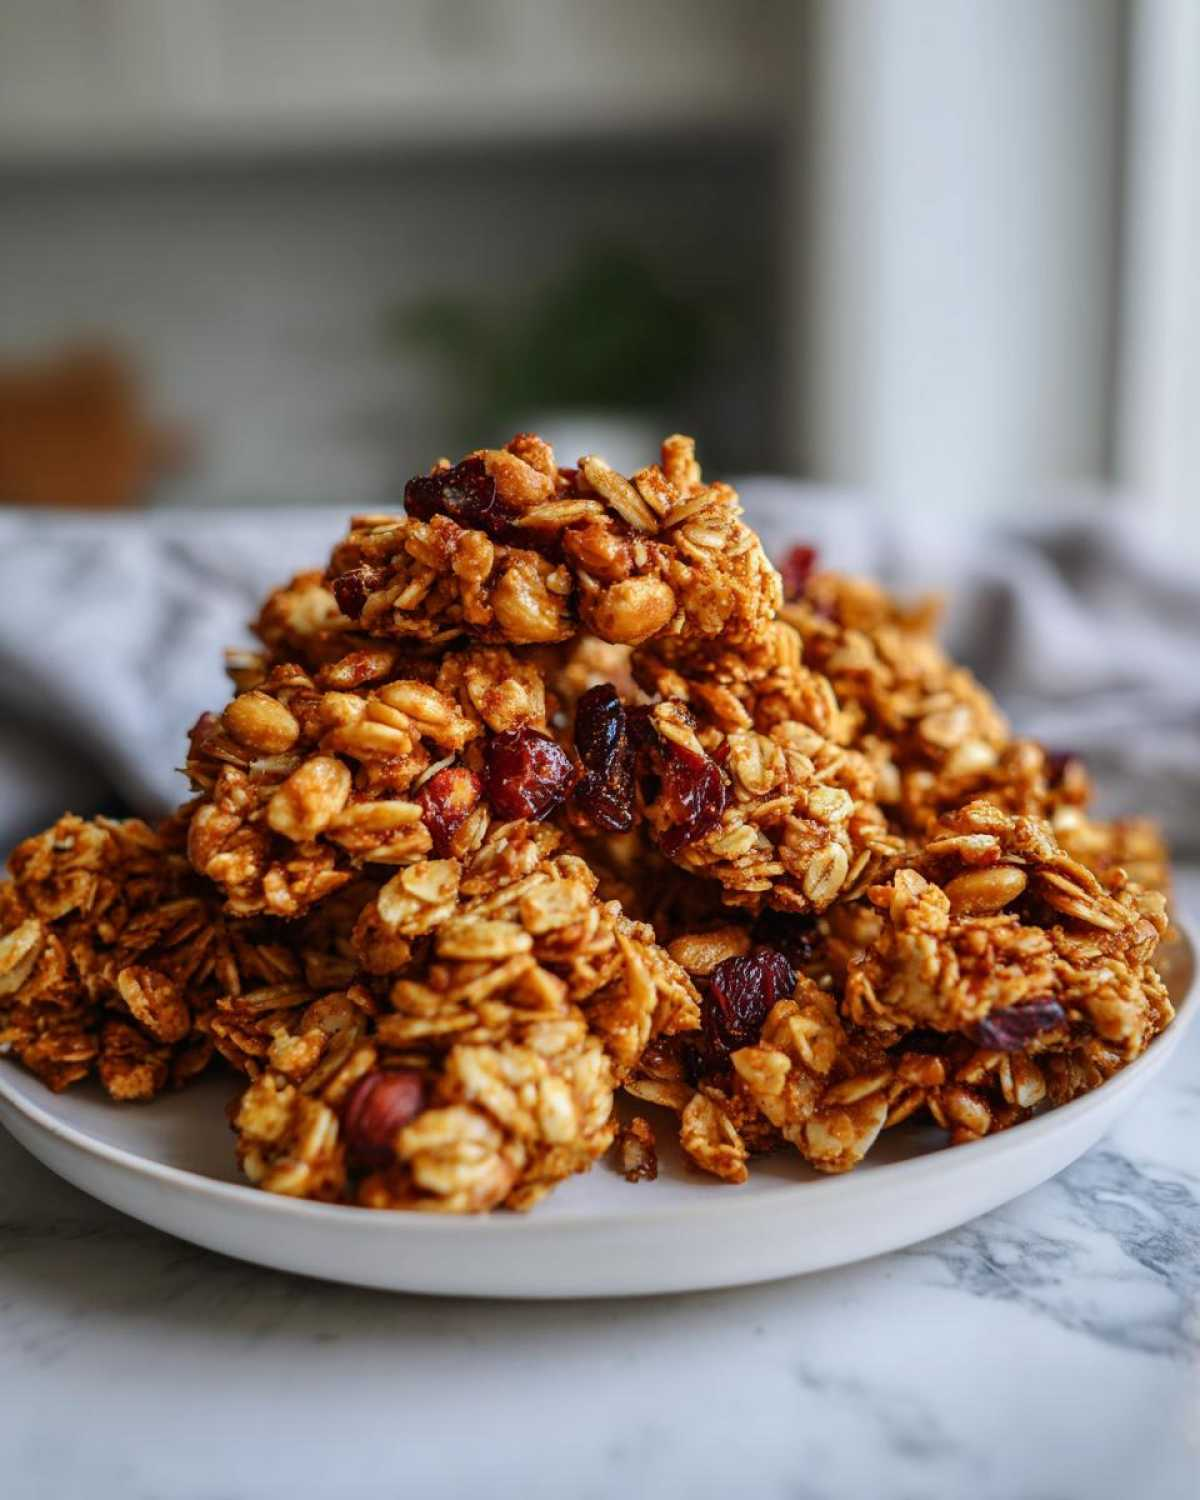
Granola is a baked mixture of rolled oats combined with a fat and a sweetener, then toasted until golden and crisp. It began as a health food in the nineteenth century and has since become a breakfast staple loved for its crunch and versatility. Most recipes also include nuts, seeds, and sometimes dried fruit for extra flavor and texture.
The difference between granola and plain toasted oats comes down to the clusters. A good recipe uses just enough liquid to bind the oats together so they clump into crunchy pieces rather than staying loose like cereal flakes. That clumping is what people usually mean when they say granola tastes homemade rather than store bought.
Why Make Granola At Home
Store bought granola can be surprisingly high in added sugar and oil even when the packaging looks healthy. Making your own gives you the ability to control exactly how much sweetener goes in and to swap ingredients based on your taste or dietary needs.
Cost is another big reason people switch to making their own. A large bag of oats, nuts, and seeds bought in bulk usually works out to a fraction of the price per serving compared to a boxed granola brand. On top of that, homemade granola tends to taste fresher because you are baking it right before you plan to eat it rather than buying something that may have sat on a shelf for months.
Ingredients For Homemade Granola
The base is simple and most of the ingredients are pantry staples. Here is what you need for a standard batch that yields about six cups.
| Ingredient | Amount | Purpose |
|---|---|---|
| Rolled oats | 4 cups | Base of the granola |
| Neutral oil or melted coconut oil | Half cup | Helps clusters form and adds crunch |
| Honey or maple syrup | Half cup | Sweetens and binds the oats |
| Salt | Half teaspoon | Balances the sweetness |
| Vanilla extract | 1 teaspoon | Adds warmth and depth of flavor |
| Cinnamon | 1 teaspoon | Optional but adds a warm background flavor |
| Chopped nuts | 1 cup | Adds protein and crunch |
| Seeds such as pumpkin or sunflower | Half cup | Adds texture and nutrients |
| Dried fruit | Half cup | Added after baking for chewiness |
You do not need every ingredient listed above to make good granola. The oats, oil, and sweetener are the only true essentials. Everything else can be adjusted based on what you enjoy or already have in your kitchen.
Step By Step Homemade Granola Recipe
Making granola at home is a low effort process that mostly involves mixing and baking. Follow the steps below for reliable clusters every time.
Prepare The Oven And Baking Sheet
Preheat your oven to three hundred degrees Fahrenheit, which is about one hundred fifty degrees Celsius. A lower temperature prevents the granola from burning before the center dries out. Line a large baking sheet with parchment paper so the granola does not stick and cleanup stays easy.
Mix The Wet And Dry Ingredients
In a small saucepan or microwave safe bowl, warm the oil and honey together until they are thin and easy to pour. Stir in the vanilla, salt, and cinnamon. In a large bowl, combine the oats and any nuts or seeds you are using, then pour the warm liquid mixture over the top. Stir until every oat looks lightly coated and glossy.
Spread And Press The Mixture
Pour the mixture onto your lined baking sheet and spread it into an even layer. For extra clumpy granola, press the mixture down firmly with the back of a spatula or a flat-bottomed cup. This step matters more than people expect, since pressing the oats together encourages larger clusters once baked.
Bake And Stir
Bake for about thirty five to forty minutes. Stir the granola gently every ten minutes so it browns evenly and does not burn around the edges. In the final ten minutes, leave larger sections undisturbed if you want bigger clusters rather than loose crumbs.
Cool Completely Before Breaking Apart
Once the granola looks golden brown, remove it from the oven and let it cool completely on the baking sheet without stirring. This resting period is what allows the clusters to firm up and harden. Breaking it apart too early will give you soft, crumbly granola instead of crunchy clusters.
Add Dried Fruit And Finish
Once the granola is fully cool, break it into clusters of your preferred size and stir in any dried fruit. Adding dried fruit after baking keeps it soft and chewy instead of hard and burnt.
Tips For The Best Homemade Granola
Getting consistently crunchy granola comes down to a few small details that are easy to overlook.
- Use old fashioned rolled oats rather than quick oats, since quick oats turn mushy in the oven.
- Do not skip the resting time after baking. Most of the crunch develops as the granola cools.
- Spread the mixture thin so it toasts evenly instead of steaming in a thick pile.
- Press the mixture down before baking if you want bigger clusters.
- Store granola only once it has fully cooled to room temperature to avoid trapping steam inside the container.
Common Mistakes When Making Granola
- Using too much liquid: This makes the granola soggy and prevents it from crisping up properly.
- Baking at too high a temperature: This can burn the outside while the inside stays soft.
- Stirring too often near the end: Constant stirring breaks up clusters before they have a chance to set.
- Adding dried fruit before baking: This dries out the fruit and can make it hard and chewy in an unpleasant way.
- Storing while still warm: This traps moisture and softens the granola faster than it should.
Ways To Customize Your Homemade Granola Recipe
One of the best parts of making granola from scratch is how easy it is to adapt. Once you understand the base ratio of oats, oil, and sweetener, you can build countless variations.
| Style | Add These Ingredients |
|---|---|
| Nutty and rich | Almonds, walnuts, and a touch of peanut butter |
| Tropical | Coconut flakes, dried pineapple, and macadamia nuts |
| Chocolate | Cocoa powder in the wet mix and chocolate chips after baking |
| Spiced | Extra cinnamon, ginger, and a pinch of nutmeg |
| High protein | Chopped nuts, seeds, and a scoop of protein powder mixed into the dry oats |
Feel free to mix and match based on what is in your pantry. Granola is forgiving, and most swaps work as long as the overall ratio of wet to dry ingredients stays about the same.
Homemade Granola Versus Store Bought Granola
Many people assume all granola is automatically healthy, but store bought versions can vary widely in sugar and calorie content depending on the brand.
| Factor | Homemade Granola | Typical Store-Bought Granola |
|---|---|---|
| Added sugar | Fully controlled by you | Varies widely by brand; often higher than expected |
| Ingredients | Simple and recognizable | May include preservatives and added oils |
| Cost per serving | Usually lower | Often higher per ounce |
| Freshness | Made right before eating | May sit on shelves for months |
| Customization | Fully flexible | Fixed recipe |
This does not mean store bought granola is bad. It simply means a homemade granola recipe gives you more control if you are watching your sugar intake or trying to avoid unnecessary additives. Checking the nutrition label on any packaged granola is the most reliable way to compare it against a homemade batch.
How To Store Homemade Granola
Proper storage keeps your granola crunchy for as long as possible. Once the granola has cooled completely, transfer it to an airtight container or a resealable bag with the air pressed out. Store it at room temperature away from direct sunlight, and it should stay fresh and crisp for about two weeks.
If you want it to last longer, you can freeze granola in a sealed bag for up to three months. There is no need to thaw it before eating, since it can be enjoyed straight from the freezer or left at room temperature for a few minutes to soften slightly.
Serving Ideas For Homemade Granola
Granola is not just for breakfast bowls. Here are a few simple ways to use it throughout the day.
- Sprinkle it over yogurt with fresh berries for a quick breakfast or snack.
- Use it as a crunchy topping for oatmeal or smoothie bowls.
- Pack a small bag as a portable snack for hiking or travel.
- Layer it into a parfait with yogurt and fruit for a simple dessert.
- Eat it plain with milk as a homemade cereal alternative.
Frequently Asked Questions
How long does homemade granola last?
Stored in an airtight container at room temperature, homemade granola typically stays fresh for about two weeks. Freezing it extends that to around three months.
Why is my homemade granola not clumping?
Clumps form from a combination of enough liquid, pressing the mixture down before baking, and letting it cool undisturbed. If your granola is not clumping, try adding a bit more oil or honey and pressing the mixture firmly before it goes into the oven.
Can I make granola without oil?
Yes. You can replace the oil with mashed banana, unsweetened applesauce, or a nut butter. The texture will be slightly different and less crisp, but it will still bake into clusters.
Is homemade granola healthier than store bought?
It can be, since you control exactly how much sugar and fat goes into it. Some store bought brands include more added sugar than people expect, even when the packaging suggests it is a health food, so it is worth comparing labels.
What oats work best for a homemade granola recipe?
Old fashioned rolled oats give the best texture. Quick oats tend to turn soft and mushy, while steel cut oats do not soften enough during baking.
Can I make granola without a sweetener?
You can reduce the sweetener, but removing it completely will affect both flavor and clumping, since the sugar helps bind the oats together as it caramelizes in the oven.
How do I keep granola from burning?
Bake at a low temperature, around three hundred degrees Fahrenheit, and stir every ten minutes. Keeping a close eye on the granola during the last ten minutes of baking helps prevent burning around the edges.
Can I add protein powder to homemade granola?
Yes. Mix a scoop of protein powder into the dry oats before adding the wet ingredients. You may need a little extra oil or honey, since protein powder can dry out the mixture.
Conclusion
A homemade granola recipe is one of the easiest ways to turn a handful of pantry staples into a crunchy, customizable breakfast or snack. With just oats, oil, and a sweetener as the base, you can build endless variations while keeping full control over sugar and ingredients. Once you get the basic method down, this recipe becomes one you will return to again and again, and it fits naturally into a broader personalized meal plan built around your goals.
References
- United States Department of Agriculture, FoodData Central
- Whole Grains Council